
I ordered a small quantity of the Eccorok and cast a couple of sample pieces to test the formula and develop the color tint that I was after. It seemed to be easier to work with, stronger, and more dense than Portland-based product I had used in the past, so I was sold! We purchased enough for casting the barn kitchen counter tops and back splashes, and I got started making the templates and forms. The forms were made at a friend's shop, on his steel casting table. The counters are formed face-down and the mix is contained by the melamine borders glued to the table. Since I couldn't fit all the forms on the table, I made one of them (shown in the foreground) on a base of our particleboard material coated with polyurethane, and let it overhang the edges of the casting table. Also shown is the steel rebar pieces that are suspended in the form to reinforce the concrete.
 With the forms prepared, we were ready for 'casting day'. On the advice of the distributor, I made one little change to the mix formula by adding a set retarder this time- a product used to slow the rate at which the concrete hardens, thereby increasing the "work time" available. Seemed like a good idea, and the casting process went well, or so we thought.
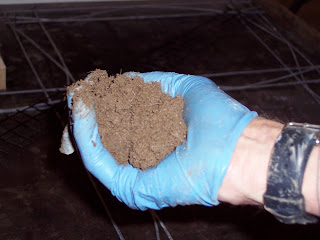
But that seemingly innocent little additive was a BIG mistake! In the cool, low-humidity northern Minnesota conditions, the last thing we needed was a set retarder. Instead of 'curing' in the forms, the chemical hardening process was so much retarded by the additive that a reaction took place between the mix and the surfaces of the casting forms and table. When they were removed several days later, we had to forcefully pry the counter tops off the casting table, and parts of the counter tops literally delaminated in the process. Instead of the crisp edges and dense hard surfaces I was expecting, they were crumbly and porous. At first sight, I thought they were ruined and I'd be starting the whole process over the next day...not a good feeling.


Not wanting to toss them in the landfill and start over, I set out on a long process of damage control. The voids were filled with a 'slurry' paste of Eccorok and cenospheres (extremely small ceramic particles reclaimed as a by-product of coal-fired power plants), tinted to match the counter top color. The slurry was rubbed onto the surfaces, allowed to set up for a day or two, then wet-polished with a disc sander. But the counter tops were so soft, that the polishing process would just pull the 'grout' right off, leaving the same voids that I started with. This process was repeated several times with no success. As I dumped more time into the project, the situation improved little. Then a friend had the great idea of applying a densifying agent to the surface, which made all the difference in the world- the counter tops hardened up, the next slurry application held on better, and they began to smooth up. Shown below is the counter top after wet polishing (the wet surface makes it look shiny). The lighter brown areas are the grout-filled voids, while the darker brown is the original material. With the pieces looking hopeful, they were finally moved into the barn. Each section weighed several hundred pounds, so the process required some careful choreography and ample horsepower.

 Here's the pieces set in place in their rough form.

 After a total of 7 slurry applications over a several week span, I realized the counter tops were about as good as they were going to get- not at all what I had initially expected, but nevertheless good enough. The final step was to apply the sealer- in this case we went with a water-based zero-VOC epoxy called Eco-Tuff, which had held up pretty well to staining and water in my earlier sample testing.
 After one coat of the Eco-Tuff primer, and 3 coats of the epoxy, here is the finished product.
With the pieces looking hopeful, they were finally moved into the barn. Each section weighed several hundred pounds, so the process required some careful choreography and ample horsepower.
 Here's the pieces set in place in their rough form.
 Satisfied with the fit (and happy they didn't crack or break on moving day), I continued the slurry/grout process several more times, trying to fill the voids and get a smooth surface prior to sealing. Not able to wet polish inside the barn, I did my 'polishing' using a palm sander and a vacuum cleaner to contain the dust. It was still a mess!
After a total of 7 slurry applications over a several week span, I realized the counter tops were about as good as they were going to get- not at all what I had initially expected, but nevertheless good enough. The final step was to apply the sealer- in this case we went with a water-based zero-VOC epoxy called Eco-Tuff, which had held up pretty well to staining and water in my earlier sample testing.
After one coat of the Eco-Tuff primer, and 3 coats of the epoxy, here is the finished product.


 That's the end of my Eccorok experience for now. Start to finish, this project took around 2 months! Despite my troubles, I'd recommend the product to others and would definately use it again myself- but would omit the set retarder next time!
No comments:
Post a Comment