Now for the
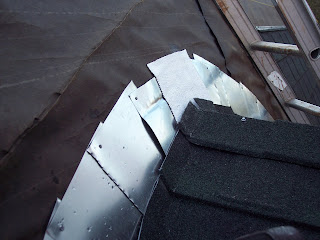
really hard part. Back in September, I had a hard time figuring out how to frame the short walkway that connects the silo with the barn roof. I thought my head was going to explode, but eventually I worked through it and it turned out well. Now came the time to flash and roof it. Again, I was stumped, and the problem brought me closer to a complete meltdown than I care to admit. Since there was no time to dwell on things (winter should be here already, so I am working on borrowed time as it is...), I kept installing the other sections of the roof while researching the details of the silo walkway. Eventually, I developed a plan which started by flashing the entire walkway with short overlapping pieces of galvanized steel- essentially, this was a custom-built valley and sidewall detail, because such curved pieces could not be purchased anywhere. I continued the flashing all the way down the barn-silo intersection all the way to the eave of the barn roof. I also added pieces of
Flexwrap at the ridge and along the silo's wall intersection to act as
counterflashing (since the silo won't be covered with stucco until next year).

Next, I traced out the curved pattern of the silo walkway's roof onto plastic sheeting, then transferred this pattern to the shingle sheets. I added a couple of inches along each edge, then cut the panels and bent the edges up so that they could be tucked under the shingles of the barn roof.
 The end result is shown in the closeup of the silo walkway below. You can see the piece of Flexwrap at the ridge (over the flashing but under the metal shingles).
 With my dad's help, the remaining shingles were installed on the barn roof, overlapping the bent-up edges of the silo walkway pieces. The end result looks very clean and will be very waterproof.


No comments:
Post a Comment