The last area calling for heat is the soon-to-be master bathroom in the upper level of the silo. Before tiling the floor, I installed a serpentine of
hydronic tubing over the
subfloor- basically 1/2"
pex tubing pressed into
Thermofin-U heat transfer plates, surrounded by 'sleepers' of 3/4" plywood to keep the floor at a consistent level.
 Schluter Ditra
 (the orange colored uncoupling membrane) was mortared over the
subfloor assembly, and then our local slate
cleftstone was mortared over the
Ditra. By nature, this slate is not perfectly flat like manufactured tiles, so there was some resulting variability in the pieces. I did my best to maintain smooth transitions from stone to stone.

After setting the stones, I put down the last few planks in the entryway, scribing the final board to fit the curve of the stones.

The stones still need to be cleaned, sealed and grouted once the mortar has fully cured, but you get the idea.

In the boiler room, I connected the lines for the bedroom and bathroom
hydronic loops and installed electronic zone valves so they can be regulated separately from the in-slab heat. I also extended the supply and return branches that will run outside to the solar thermal panels we'll be installing this summer. Everything went back together and I fired the system back up this morning without any leaks. The barn is now fully heated and solar-ready!

 I was able to salvage more than enough to complete the wall, so I may use the rest to build cabinet doors in the kitchen....
 I hit it with the palm sander to remove the surface residue and gave it a seal coat of shellac, then my mom came over and put on several coats of our Bioshield clay paint and AFM Polyureseal to match the ceiling upstairs- nice!
 The top shelf will be a built-in storage cabinet.
 While researching lighting options, I stumbled across a really cool LED step light kit from somebody far more intelligent than me. The little LED bulbs are flush-mounted into holes drilled through the back of each step riser, and the whole system is motion activated by infared beams at the top and bottom steps. It only took me couple hours to install the whole system, and at night it looks something like this:
 The lights automatically fade out one-by-one after about 20 seconds, then are reactivated whenever motion is detected. After playing with them every night for a week now, I'd say the lights are about 50% safety feature and 50% pure geek bling :)


 Here's the finished collector, with twinwall polycarbonate glazing fastened down.

 Ready for installation next weekend!

 With the forms prepared, we were ready for 'casting day'. On the advice of the distributor, I made one little change to the mix formula by adding a set retarder this time- a product used to slow the rate at which the concrete hardens, thereby increasing the "work time" available. Seemed like a good idea, and the casting process went well, or so we thought.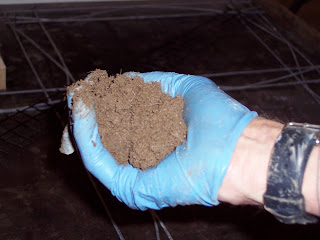


 With the pieces looking hopeful, they were finally moved into the barn. Each section weighed several hundred pounds, so the process required some careful choreography and ample horsepower.

 Here's the pieces set in place in their rough form.
 After a total of 7 slurry applications over a several week span, I realized the counter tops were about as good as they were going to get- not at all what I had initially expected, but nevertheless good enough. The final step was to apply the sealer- in this case we went with a water-based zero-VOC epoxy called Eco-Tuff, which had held up pretty well to staining and water in my earlier sample testing.
 After one coat of the Eco-Tuff primer, and 3 coats of the epoxy, here is the finished product.


 That's the end of my Eccorok experience for now. Start to finish, this project took around 2 months! Despite my troubles, I'd recommend the product to others and would definately use it again myself- but would omit the set retarder next time!
 Basically, I started by making a 4X8 'box of 2x6 lumber and a plywood bottom.
 Then I added 1.5" of
  Next, I soldered together the copper piping that will carry water through the collector- basically 1/2" 'risers' connected to 3/4" manifolds, with an inlet on one end and outlet in the opposite corner. This copper is the expensive part of the project, but I managed to get a pile of tubing for less than scrap prices off
 The fins were then clamped around the tubing using some special vice grip clamps made by a friend of ours for this project. With the clamps forcing the aluminum fins tightly around the copper, I put in several screws through to the plywood base to hold everything in place. This system seemed to work very well once I got the hang of it.
 Here's a close-up of the fins installed over the tubing.
 Then I gave the assembly a coat of black paint.
 and finally cut a piece of

 I also milled two more of our 'salvaged' maple logs into pieces for the stair treads and risers. I used the Alaskan mill to whittle the logs down to a size that would fit into the band mill. Since we don't have a team of horses to do the hauling, I improvised with a furniture dolly. The timber weighed several hundred pounds, but was manageable for me and my two-wheeler.

 Then I built a "


 The aluminum plates help conduct the heat out of the


